REST API와 $resource
앵귤러에서 AJAX를 이용한 서버 통신은 $http 서비스를 사용한다. 제이쿼리의 ajax() 함수와 사용법이 유사하다.
// GET /things
$http.get('/things')
  .then(function(response) {

  }, function (error) {

  });

// POST /things
$http.post('/things', {name: 'name of thing'})
  .then(function(response) {

  }, function (error) {

  });
그러나 REST API로 구현된 백엔드 서버의 자원을 사용한다면 $http 서비스 보다는 $resource 서비스를 사용하는 것을 권장한다. 이름만 봐도 감이 온다. HTTP 호출로 요청하는 서버 데이터를 자원(resource)으로 추상화하는 서비스다. /things라는 URI를 $resource 서비스로 만들면 사용하는 입장에서는 get(), post(), delete(), update() 등의 함수만 사용하면 된다. 말로 해서는 감이 안온다. 예제를 보면서 확인해 보자.
REST API 백엔드 만들기
- GET /things: 자원 목록을 조회한다.
- POST /things: 새로운 자원을 추가한다.
- GET /things/:id: 자원 id로 조회한다.
- PUT /things/:id: 자원 정보를 업데이트 한다.
- DELETE /things/:id: 자원을 지운다.
$resource 서비스를 이용하여 백엔드 API를 사용하는 Thing 서비스를 만들어보자.
'use strict';

angular.module('resourceAndRestApiApp')
    .service('Thing', function ($resource) {
      return $resource('/api/things/:id', {id: '@id'}, {
        update: {
          method: 'PUT'
        }
      });
    });
$resource 서비스에 자원의 URI 문자열을 파라매터로 넘겨주면 된다. 두번째 파라매터는 URI의 :id 부분에 값을 지정하기 위한 객체이다. Thing 서비스 사용시 넘겨줄 객체중 id 키값을 :id에 대입하게 된다. $resource 서비스는 GET, POST, DELETE 메소드가 기본적으로 제공된다. 우리는 PUT 메소드도 사용하기 때문에 세번째 파라메터에 설정을 추가한다.
Thing 서비스 사용하기
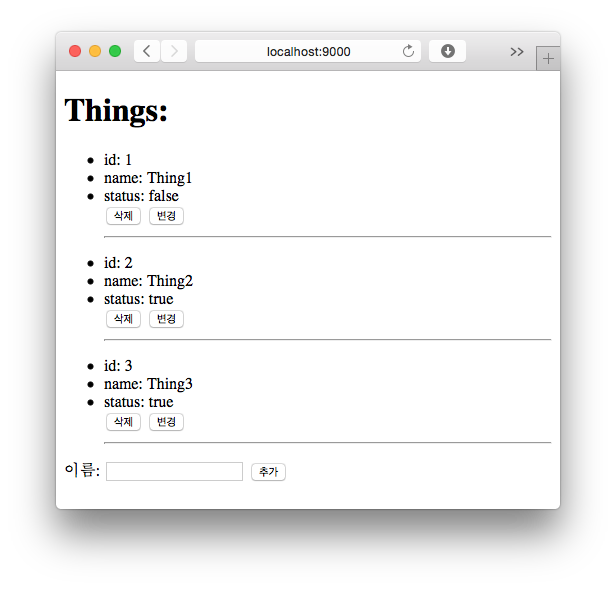
뷰를 간단히 만들자.
<h1>Things:</h1>

<div ng-repeat="thing in things">
  <ul>
    <li>id: {{thing.id}}</li>
    <li>name: {{thing.name}}</li>
    <li>status: {{thing.status}}</li>
    <button ng-click="destroy(thing)">삭제</button>
    <button ng-click="update(thing)">변경</button>
    <hr/>
  </ul>
</div>

<form name="form" ng-submit="create(form)">
  <label for="name">이름:</label>
  <input type="text" name="name" ng-model="name" />
  <button type="submit">추가</button>
</form>
서버 자원이 저장될 things 스코프 변수를 사용한다. ng-repeat으로 루프를 돌면서 객체 정보를 보여줄 것이다. 그리고 각 정보에 삭제, 변경 버튼을 위치한다. 하단에는 새로운 thing을 추가하기 위한 폼을 만들었다.
Thing 서비스를 이용해 백엔드 자원을 가져올 컨트롤러를 보자.
'use strict';

angular.module('resourceAndRestApiApp')
    .controller('MainCtrl', function ($scope, Thing) {

      $scope.things = Thing.query();

      $scope.destroy = function (thing) {
        Thing.remove({id: thing.id}).$promise.then(function () {
          $scope.things = Thing.query();
        })
      };

      $scope.update = function (thing) {
        Thing.update({id: thing.id}, {status: !thing.status}).$promise.then(function () {
          $scope.things = Thing.query();
        })
      };

      $scope.create = function (form) {
        var thing = new Thing({
          name: $scope.name
        });
        thing.$save().then(function () {
          $scope.things = Thing.query();
        });
      }
    });
컨트롤러 정의시 Thing 서비스를 주입하여 함수 내에서 사용하도록 한다. Thing.query() 를 호출하면 내부적으로 GET /api/things 프로토콜을 호출할 것이다. 그 결과가 $scope.things 변수에 저장된다. 동시에 이 변수와 바인딩된 뷰에도 정보가 출력될 것이다.
뷰의 삭제 버튼 클릭시 $scope.destroy() 함수가 동작한다. Thing.remove({id: thing.id})는 내부적으로 DELETE /api/thing/:id 를 호출하면서 :id에 뷰로부터 넘어온 thing.id 값을 설정하여 보낸다. 즉 id가 3인 things의 삭제 버튼을 클릭하면 DELETE /api/thing/3 이 호출되는 격이다. 변경 버튼도 비슷하게 동작한다.
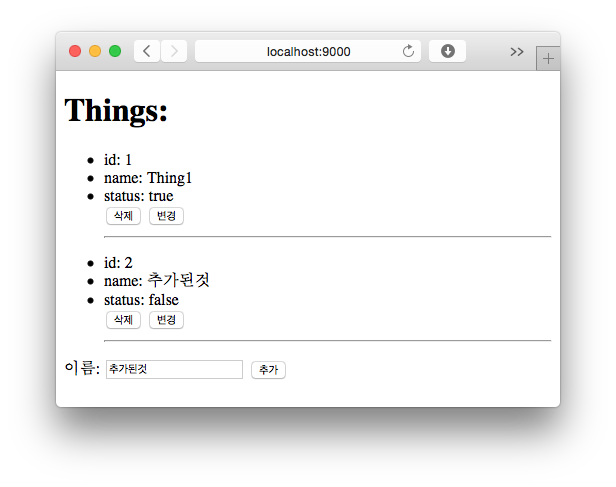
뷰 하단의 폼 필드를 채워넣고 추가 버튼을 클릭하면 컨트롤러의$scope.create() 함수가 동작한다. 예상대로 POST /api/things 가 호출될 것이다. new Thing({name: $scope.name})으로 생성자 함수를 사용하는 것 처럼 코드를 작성한다. 그리고 객체의 $save() 함수로 실제 프로토콜을 호출하여 서버로 요청한다.
샘플코드: https://github.com/jeonghwan-kim/resource-and-rest-api